How to: OpenGraph previews with Hugo
Let’s face it. The social preview of my website looks like absolute ass. I guess that makes it consistent with what you can expect when you click a link, but it makes it less motivating to actually share something. For example this is what it looks like on Discord:
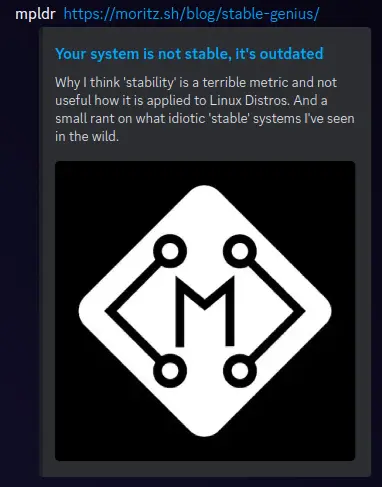
Yikes. I mean, sure, I like my logo, but this is basically screaming “you know, I never cared enough”. Let’s go and change that!
The star: Go’s templating engine
Hugo is written in Go and Go has html/template in it’s
standard library. I am not too sure if this was Rob Pikes wet dream of a
functional language, but in any case, that’s how we ended up with an extremely
powerful, extendable, and reasonably fast templating engine.
Why a functional language? Simple, take a look at this piece of code we’ll get to later in this post:
{{ $filters = $filters | append
	(images.Text
		$line
		(dict
			"color" "#000"
			"size" 60
			"x" 32
			"y" $y
			"font" (resources.Get "opengraph-font.ttf")
		)
	)
}}
While not entirely functional (we’re mutating a variable! The horror!), it’s certainly closer than the usual procedural nature most of us are used to.
Inspiration
As “inspiration” (read: I’ll just rip off their style), I’ll take the style of Tachiyomi’s OpenGraph graphic:

You can also take a look at it in the wild on FOSStodon.
If you already have a background you want to use, you can just skip straight to the template part
Getting the graphics
Let’s start with the background. Since I will put whatever is needed into the git Repo backing this blog, I’d prefer to generate it instead. Fortunately I know shell scripting and a bit about how to use Imagemagick.
Let’s start with a white canvas we can put the rest of the stuff on.
convert -size 1200x630 xc:white bg.png

Neat. Now for the see-through logos in the background. It took me way to long to notice that they are simply placed in rows1. So let’s do that as well. We should probably vary rotation and distance so we don’t get a checkerboard though.
convert -size 1200x630 xc:white \
	$(for i in $(seq 77 400 1200); do echo "( logo.png -resize 64x64 -rotate 155 ) -geometry +$(echo "$i%1200" | bc)-32 -channel A -evaluate multiply 0.1 +channel -composite "; done) \
	$(for i in $(seq -1 300 1200); do echo "( logo.png -resize 64x64 -rotate 70 ) -geometry +$(echo "$i" | bc)+62 -channel A -evaluate multiply 0.1 +channel -composite "; done) \
	# repeat a few times
	bg.png
You might be asking what that idiot is doing there, with those for loops and
nested everythings. The answer, dear reader is: I am generating the parameters
for Imagemagick. This fills in the ( logo.png -resize 64x64 -rotate 155 ) -geometry +$(echo $i%1200" | bc)-32 -channel A -evaluate multiply 0.1 +channel -composite with the offsets I want and makes the logo’s opacity 10 %.

Looks random enough for me. Now for the smaller logos. We just add some more
logos, but with -resize 32x32. The way we make sure these don’t overlap with
the already existing logos is by utilizing the one thing mathematicians are
afraid of: trial and error.
convert -size 1200x630 xc:white \
	$(for i in $(seq 77 400 1200); do echo "( logo.png -resize 64x64 -rotate 155 ) -geometry +$(echo "$i%1200" | bc)-32 -channel A -evaluate multiply 0.1 +channel -composite "; done) \
	$(for i in $(seq -1 300 1200); do echo "( logo.png -resize 64x64 -rotate 70 ) -geometry +$(echo "$i" | bc)+62 -channel A -evaluate multiply 0.1 +channel -composite "; done) \
	# repeat a few times
 	$(for i in $(seq 310 290 1200); do echo "( "$1" -resize 32x32 -rotate 984 ) -geometry +$(echo "$i%1200" | bc)+550 -channel A -evaluate multiply 0.1 +channel -composite "; done) \
	$(for i in $(seq 20 330 1200); do echo "( "$1" -resize 32x32 -rotate 8946 ) -geometry +$(echo "$i%1200" | bc)+590 -channel A -evaluate multiply 0.1 +channel -composite "; done) \
	bg.png

Nice! Now we just add an opaque logo in the top-left corner and a bar at the bottom and our background is done:

Putting stuff on the background with templates
Now for the part that was actually day-filling: putting stuff on the background using Go’s templating language and Hugo’s wide range of functions. You can thank me later for letting you copy the hard stuff :D
We start by defining a list of filters (right now with exactly one text-layer that is added to the image):
<!-- define filters -->
{{ $filters := slice
	(images.Text "mpldr" (dict "color" "#000" "size" 40 "x" 112 "y" 38 "font" (resources.Get "opengraph-font.ttf")))
}}
<!-- apply them to the image -->
{{ with resources.Get "opengraph.png" | images.Filter $filters }}
	<!-- and get the link to it -->
	{{ .RelPermalink }}
{{ end }}
Again, just try out positions until you’re happy with the placement. If you
struggle with where to put your background and font: inside the assets/
directory that might not exist in your repo yet.2
What you have now is basically what get if you have a page without a title (my index.html for example):

Wow, that was easy, right! Yes. But we have no logic in there so far. As soon as we add that, shit goes downhill really fast.
{{ $charsPerLine := 30 }}
{{ $count := math.Add (len (seq 0 $charsPerLine (strings.CountRunes .Title))) -1 }}
{{ $i := 0 }}
{{ $title := (safeHTML .Title) }}
{{ $words := strings.Split $title " " }}
{{ $word := 0 }}
{{ $line := "" }}
{{ range $words }}
	{{ $word = math.Add $word 1 }}
	{{ $potentialLine := printf "%s %s" $line . }}
	<!--
	of course CountRunes counts all runes that are not spaces, why would I want
	to know how many spaces there are?! And since these are templates, addition
	is only possible through a function. You see why I called it functional
	earlier?
	-->
	{{ $length := math.Add
		(strings.CountRunes $potentialLine)
		(strings.Count " " $potentialLine)
	}}
	<!-- if the word fits onto the line without exceeding our limit -->
	{{ if (le $length $charsPerLine) }}
		{{ $line = $potentialLine }}
		<!-- and is not the overall last word -->
		{{ if (ne $word (len $words)) }}
			<!-- then continue with the next word -->
			{{ continue }}
		{{ end }}
	{{ end }}

	<!-- move up by the number of lines we have and back down based on how many lines we have in total -->
	{{ $y := math.Add ( math.Add 522 ( math.Mul $count -64 ) ) (math.Mul $i 64) }}
	{{ $i = math.Add $i 1 }}
	{{ $filters = $filters | append
	(images.Text
		$line
		(dict
			"color" "#000"
			"size" 60
			"x" 32
			"y" $y
			"font" (resources.Get "opengraph-font.ttf")
		)
	)
	}}
	<!-- remember: we still have a word left over that didn't fit on the line -->
	{{ $line = . }}
{{end}}
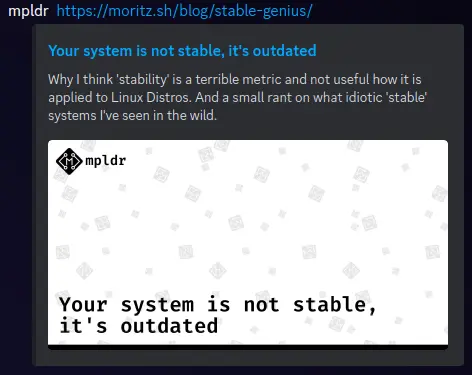
This bad boy does nothing but add the title of the page in lines3. Suffering. Is. Fun. But at least we now have our OpenGraph preview:

Awesome! Now let’s throw that thing into the header of our website/blog/whatever and take a look at the results.
{{ with resources.Get "opengraph.png" | images.Filter $filters }}
<meta property="og:url" content="{{ $.Page.Permalink }}">
<meta property="og:type" content="website">
<meta property="og:title" content="{{ $.Page.Title }}">
<meta property="og:description" content="{{ $.Page.Description }}">
<meta property="og:image" content="{{ .RelPermalink }}">
<meta name="twitter:card" content="summary_large_image">
<meta property="twitter:domain" content="moritz.sh">
<meta property="twitter:url" content="{{ $.Page.Permalink }}">
<meta name="twitter:title" content="{{ $.Page.Title }}">
<meta name="twitter:description" content="{{ $.Page.Description }}">
<meta name="twitter:image" content="{{ .RelPermalink }}">
{{ end }}
At least that was easy :) Now let’s enjoy the fruits of our labour:
Lessons learned
Lesson 1: Careful with compression
Sure, size is a serious constraint on the internet, but be careful with compression. If the size of your image is an issue, Hugo got you covered: You can just compress the picture to WEBP!
{{ $filters := slice
	(images.Text "mpldr" (dict "color" "#000" "size" 40 "x" 112 "y" 38 "font" (resources.Get "opengraph-font.ttf")))
}}

<!-- do the text stuff or whatever you want -->

<!-- and add the compression *after* you're done -->
{{ $filters = $filters | append (images.Process "webp") }}
{{ with resources.Get "opengraph.png" | images.Filter $filters }}
If you have details though (like the bars of my logo), compression could look quite bad. I have not tried if it is actually visible, but knowing the artifacts are there would bother me.
Lesson 2: Speeding up Imagemagick
My logo is an SVG. That’s great for scaling, and absolutely terrible if you want to generate your background similar to what I did. Every time you add the logo (78 times in my case), it has to first be rasterised. You can speed up processing significantly by “caching” the rasterised version of the image. For example as a PNG. Suddenly generation takes a second instead of 10 minutes.
Lesson 3: With templates, indent before coding
I know that I probably care more about indentation than the average person. With Go templates, I found indentation to be more important than the actual logic. Otherwise you lose yourself in a jungle of braces and have to wrap your head around it from the beginning every time you take a short break. Do yourself the favour: indent your code.
Lesson 4: Order your operations
When you think about it, it’s completely obvious: if you scale down your images, there are fewer pixels the following operations apply to. If you thought about it, good on you. If you didn’t, you’re welcome for significantly faster builds.
Lesson 5: URLs, not paths
Remember the snippet where you include the OpenGraph preview in the header of your page? Turns some, but not all, websites don’t like paths and would prefer URLs. So for maximal compatibility, it should be changed like this:
  {{ with resources.Get "opengraph.png" | images.Filter $filters }}
  <meta property="og:url" content="{{ $.Page.Permalink }}">
  <meta property="og:type" content="website">
  <meta property="og:title" content="{{ $.Page.Title }}">
  <meta property="og:description" content="{{ $.Page.Description }}">
- <meta property="og:image" content="{{ .RelPermalink }}">
+ <meta property="og:image" content="{{ .Permalink }}">
  <meta name="twitter:card" content="summary_large_image">
  <meta property="twitter:domain" content="moritz.sh">
  <meta property="twitter:url" content="{{ $.Page.Permalink }}">
  <meta name="twitter:title" content="{{ $.Page.Title }}">
  <meta name="twitter:description" content="{{ $.Page.Description }}">
- <meta name="twitter:image" content="{{ .RelPermalink }}">
+ <meta name="twitter:image" content="{{ .Permalink }}">
  {{ end }}
Certainly long enough to take a look into how to make something appear random, while being strictly deterministic. ↩︎
I definitely knew that all along and didn’t smash my head against the table until I went into Hugo’s source code just to find out where those assets go! ↩︎
This only works with monospaced fonts. Good luck adapting this for variable-width fonts. Let me know if you manage to do it :) ↩︎